In-App Help was last updated in 8.6.4 (released 10/23/2019) if you are looking for help with a feature that has been added or enhanced since 8.6.4, please check in Online Help from Help menu.
Defining Effort Distribution Notifications
Note: Your Staff Manager configuration may not include this optional application. To add this application to your configuration, contact your Clinical Consultant or Client Advocate.
You can use Notifications to send Staff Manager Discrepancy Reports (CDRs) to the appropriate individuals.
- From the Configure menu, select Interface Mappings > Effort Distribution > Field and Notification Setup. This opens the Fields and Notification Setup page. The Effort Distribution Field Setup tab is active by default.
- Click the Notification Distribution List Setup tab. This opens the Notification Distribution List table. Items that you must complete have a yellow background.
- Enter the person’s email address, such as Jane@Example.com.
- Enter a description, such as Jane Doe, ED Project Lead.
- Click Save to save your changes.
When you click Save, Staff Manager validates your email addresses to ensure they use correct formatting. Email addresses must contain an @ symbol, a period (.) and a valid email domain (com, org, and so on). If an email address does not validate, the solution displays the following message: The email address entered is not a valid format. Please check the email address and re-enter.
To add another email address, click Add. This opens an editing row for the new address.
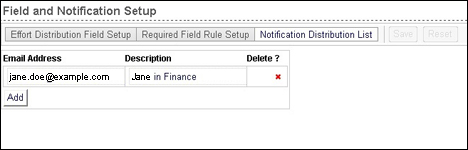
The following illustration displays the Field and Notification Setup page with the Notification Distribution List view active.
Deleting a Notification Email Address
- From the Configure menu, select Interface Mappings > Effort Distribution > Field and Notification Setup. This opens the Fields and Notification Setup page. The Effort Distribution Field Setup tab is active by default.
- Click the Notification Distribution List Setup tab.
- Click the Delete icon. This displays an alert message asking you to confirm the deletion.
- Click OK to delete the notification or Cancel to return to the Notification table without removing the rule.
 Related Topics